If you are looking for How to schedule an email in the Gmail app. Then here is the step-by-step guide for you. Just follow it.
You can schedule your emails to send at a later time. Scheduled emails may be sent a few minutes after the scheduled time.
Important: Your emails will be sent based on the timezone you schedule them in.
Also Read:- How do I change my Gmail picture on my phone?
How to schedule an email in the Gmail app
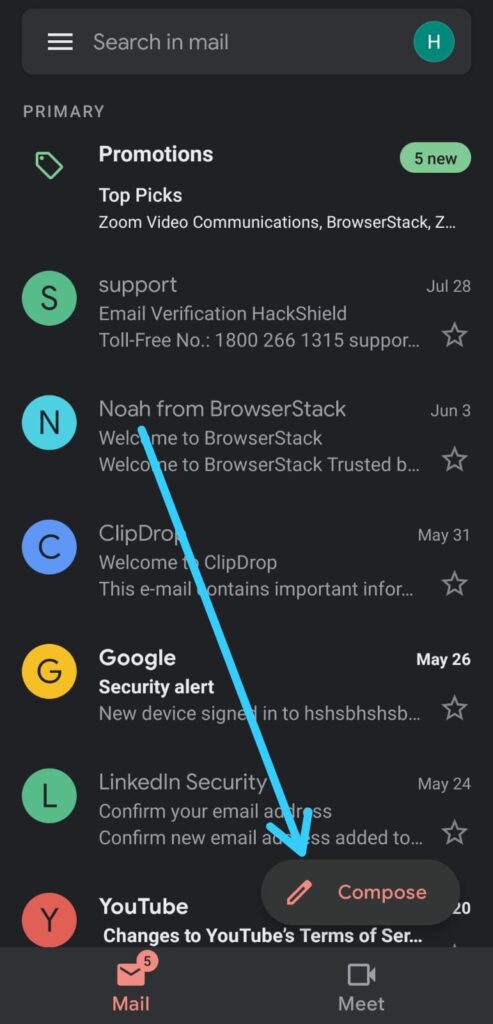
1) In the first step open the Gmail app & tap on the compose button.
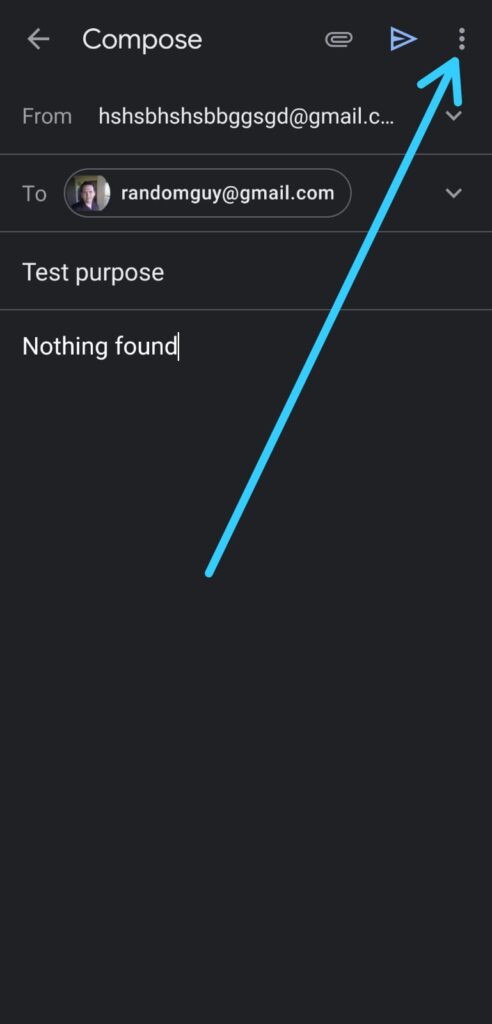
2) Now type your email as usual & after that tap on the 3 dots at the top right corner.
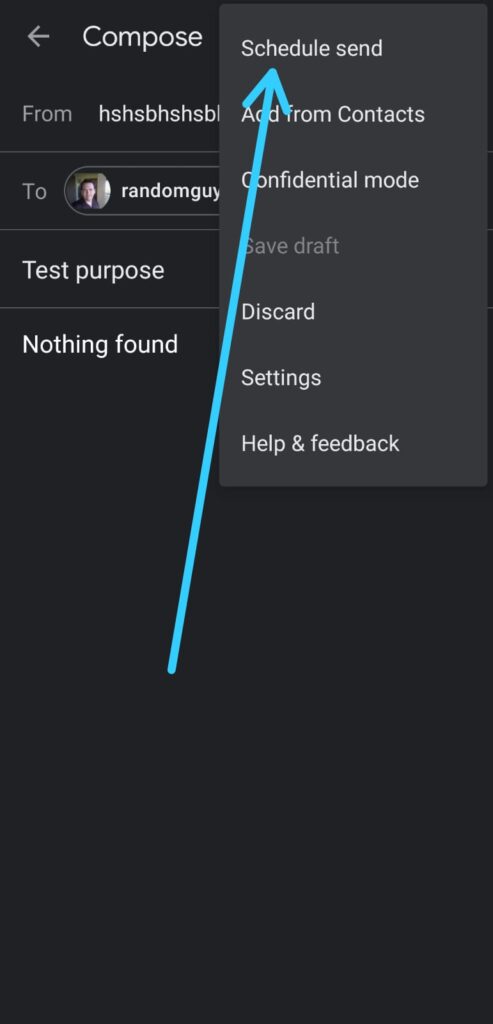
3) Next, select the first option which is Schedule send.
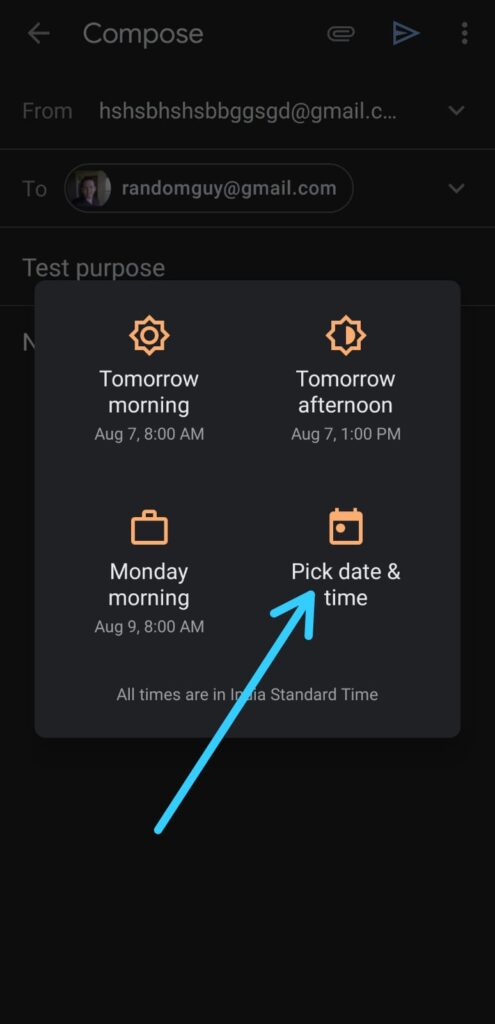
4) Here you’ll get few preset options along with a Pick date & time option. Click on Pick date & time to set your date and time manually.
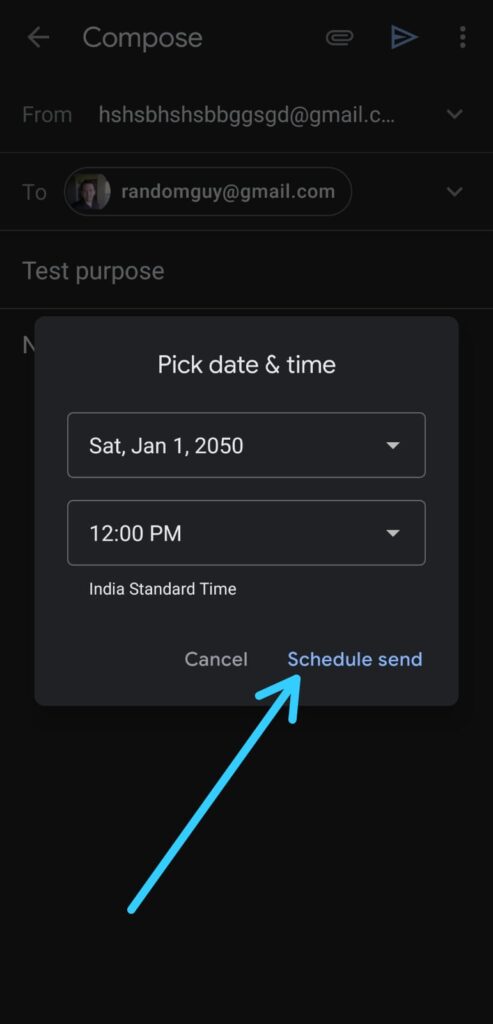
5) Setup the desired date and time, and after that tap on the Schedule send button.
How to View, Cancel & change scheduled emails in the Gmail app
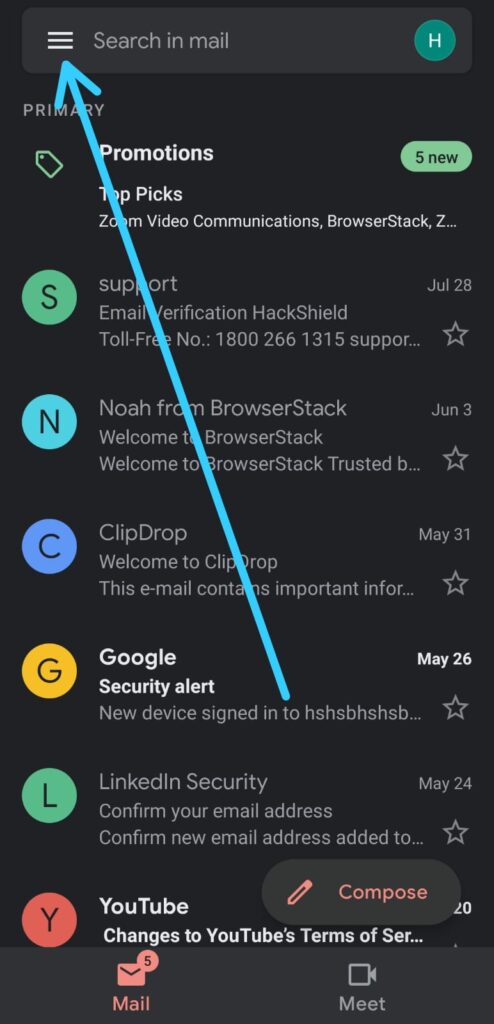
1) To view your scheduled emails in the Gmail app, open the Gmail app & tap on the icon.
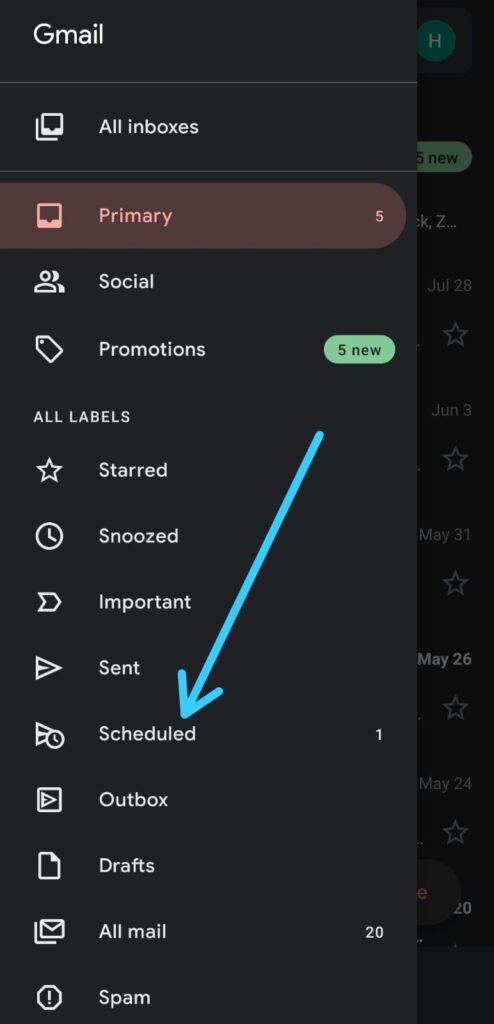
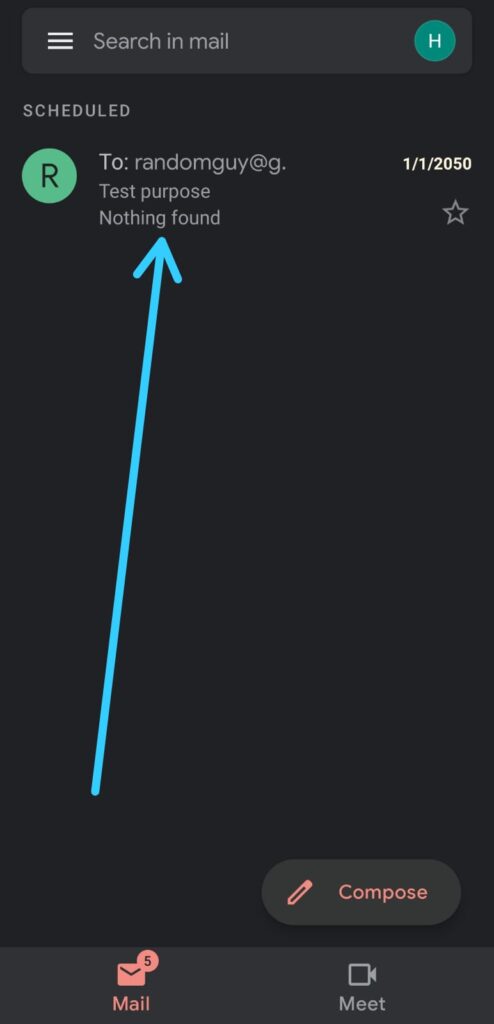
2) Now tap on the Scheduled option below the sent button.
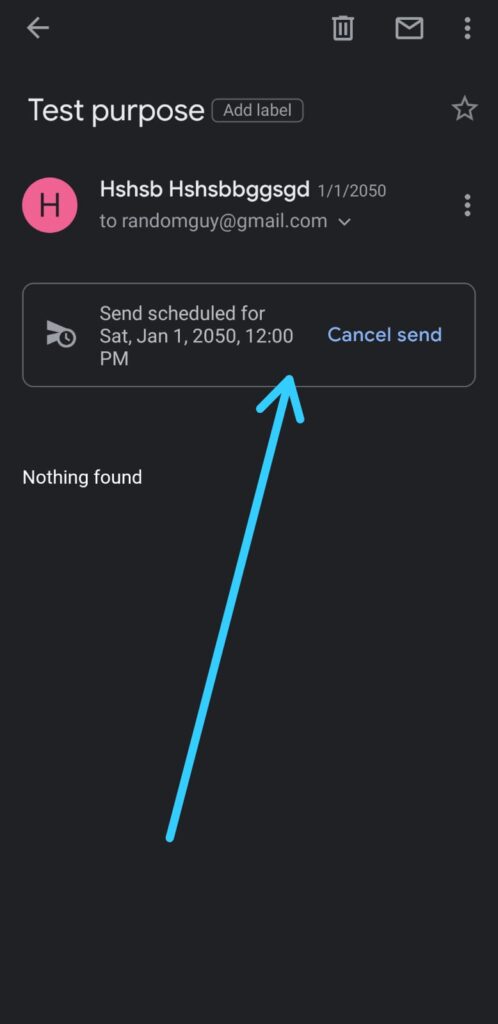
3) Here you’ll get the list of the emails you have scheduled. Tap to view this scheduled email.
4) Now in here if you tap on the Cancel send button then this will cancel your scheduled email.
5) When you cancel a scheduled email, it becomes a draft. So from the drafts, you can change your email & rescheduled it as you want.
Also Read:- How to Set an Expiry Date and Passcode to an Email on Gmail With Confidential Mode
Wrap Up: Schedule emails to send
This is all on the topic of How to schedule an email in the Gmail app. I hope it helps you.
If you got any issues then feel free to ask in the comment section or in our Telegram Group. For more tips & tricks related to Gmail, do consider joining our Telegram Channel –NixLoop to get Notify on our future updates.
1 thought on “How to schedule an email in the Gmail app”