Looking for How To Create A Wi-Fi Hotspot In Ubuntu, then follow this quick guide which explains steps to create a WiFi Hotspot in Ubuntu.
A hotspot is used to share the internet with another device. This is a very old feature of Operating systems. In the case of windows, you get a simple button to turn it on or off. But in the case of Linux Systems, particularly in Ubuntu-based systems, it’s not that straightforward. Creating and Configuring Wi-Fi Hotspot in Ubuntu is easy but for new people, it can be a bit hard to find to option. so let’s how to do it!
Also Read:- How to Install Microsoft Edge Browser on Ubuntu
How To Create A Wi-Fi Hotspot In Ubuntu in 2022
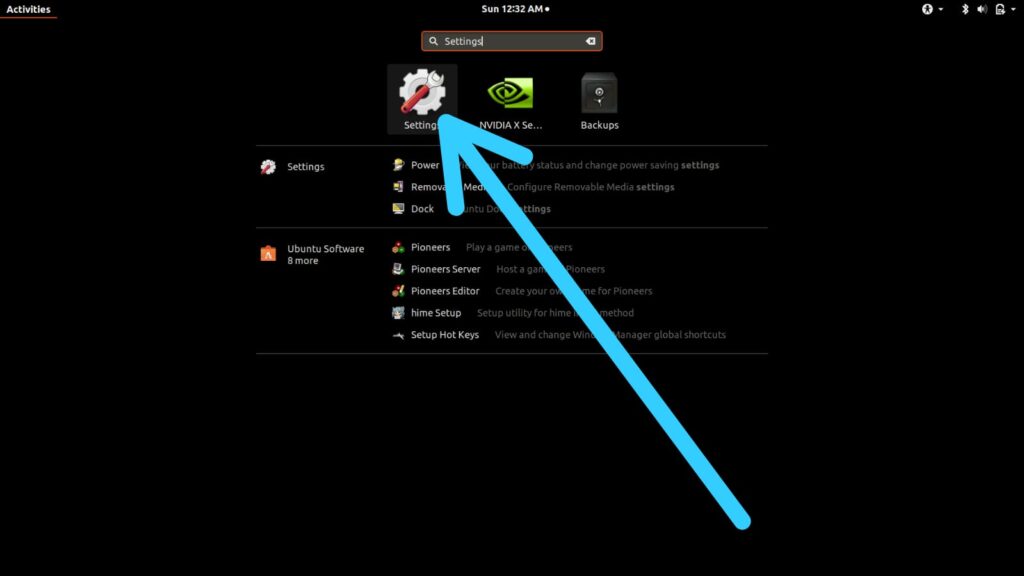
1) In the first step open the app drawer & search settings and open it.
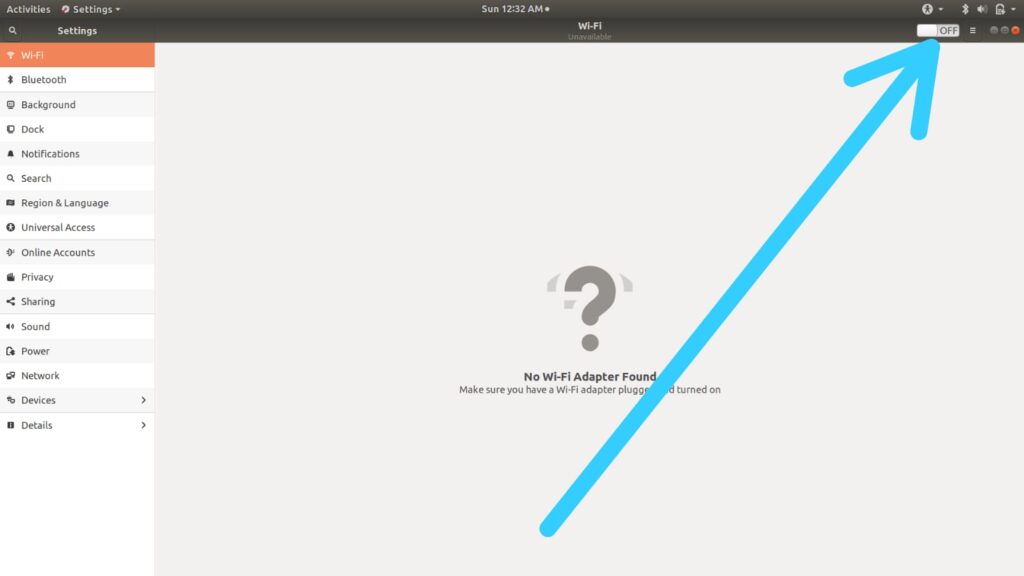
2) On the left side of the menu select Wi-Fi & turn on its toggle.
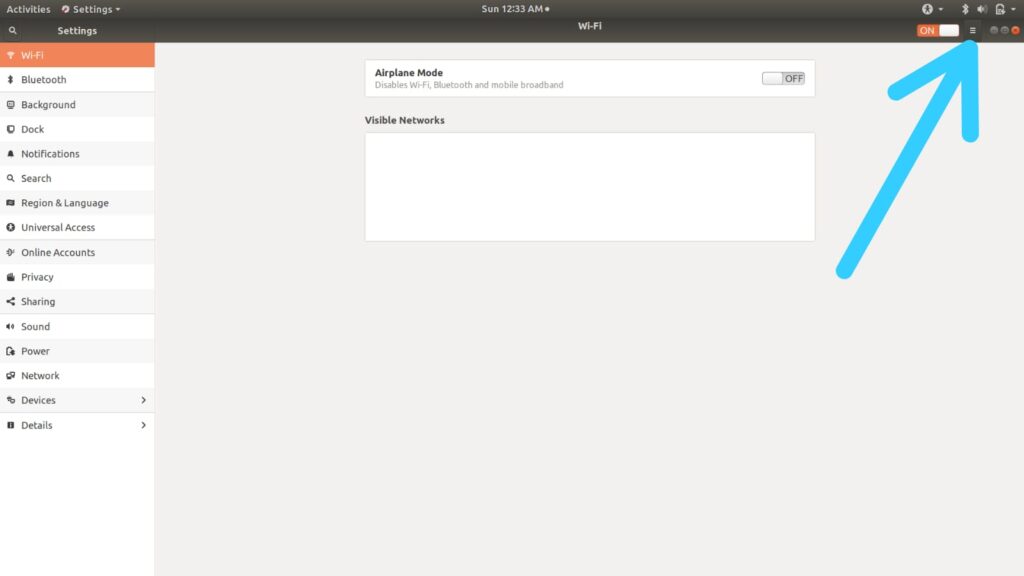
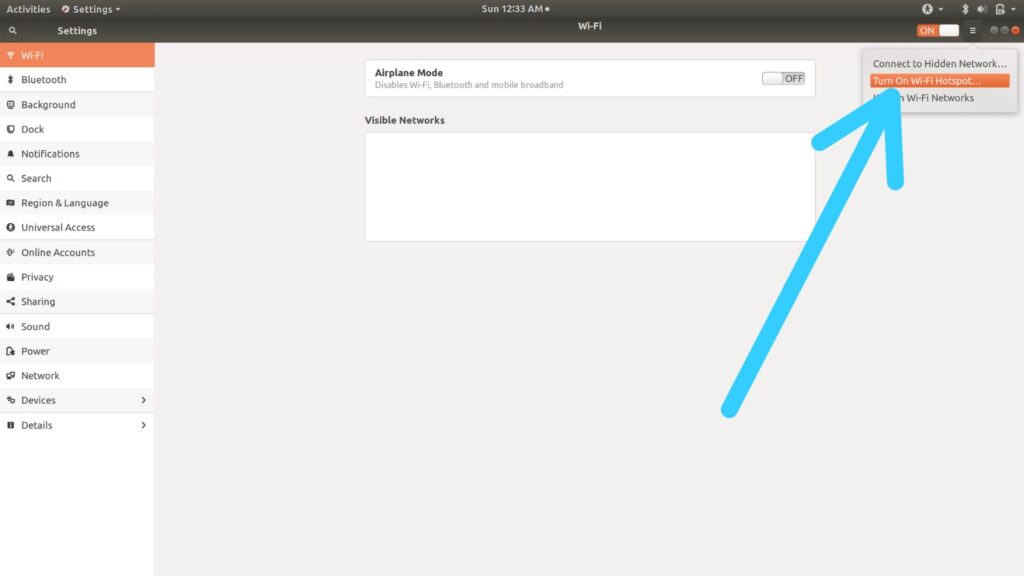
3) Now click on the Hamburger icon next to the On/Off toggle.
4) Next, click on the “Turn On Wi-Fi Hotspot” option.
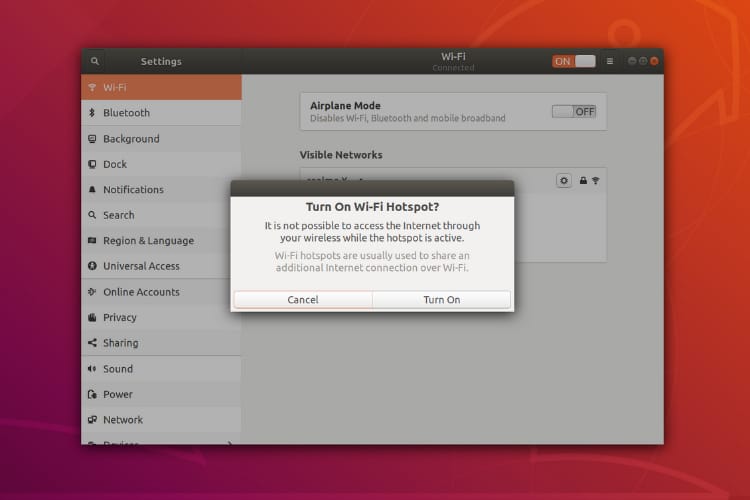
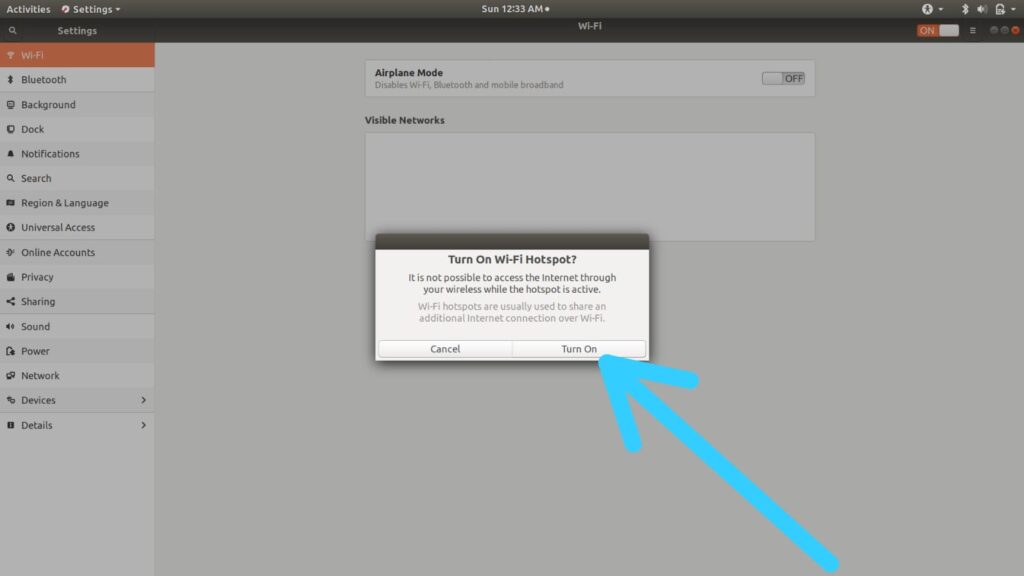
5) Now It will give a warning, just tap on the Turn On option.
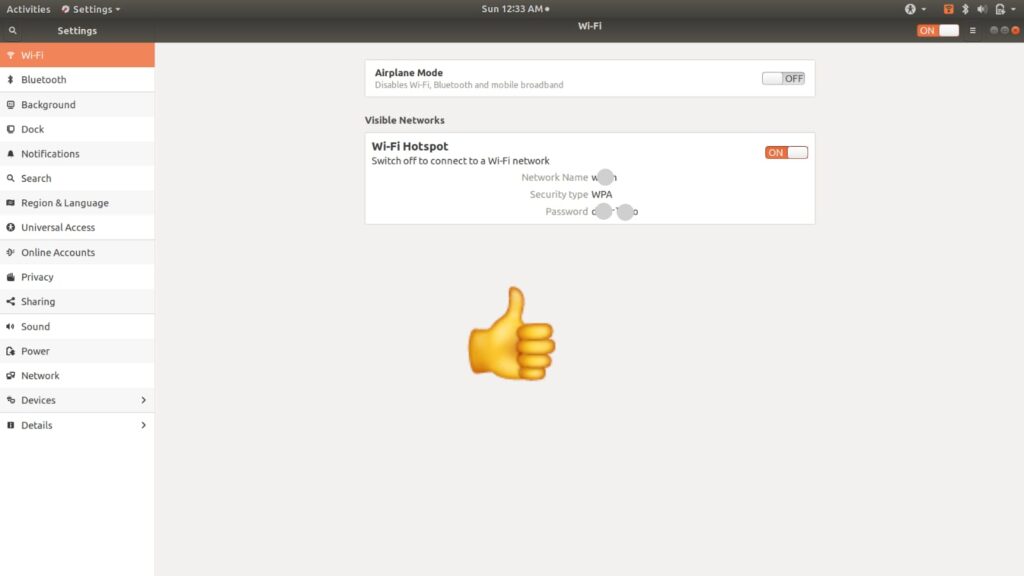
6) Here you go, now on the Wifi page, you’ll get the Hotspot name & its password. Open up your other device – A laptop or mobile phone and search for a WiFi hotspot. You will see the name of your Ubuntu system as a hotspot.
Also Read:- How to create a bootable Windows 11 USB in Linux (Ubuntu)
Wrap Up: Create A Wi-Fi Hotspot In Linux
This is all on the topic of How To Create A Wi-Fi Hotspot In Ubuntu, I hope it helps you.
If you got any issues then feel free to ask in the comment section or our Twitter page.
For more tips & tricks related to Ubuntu, You can join our Telegram Channel –NixLoop to get Notified of our future updates.
