
Taking a screenshot of an entire webpage can be a useful tool for capturing important information, creating presentations, or sharing information with others.
In this article, we will walk you through the steps to take a screenshot of an entire webpage in Google Chrome on a Mac. So, let’s get started!
Steps to take a screenshot of an entire webpage in Chrome
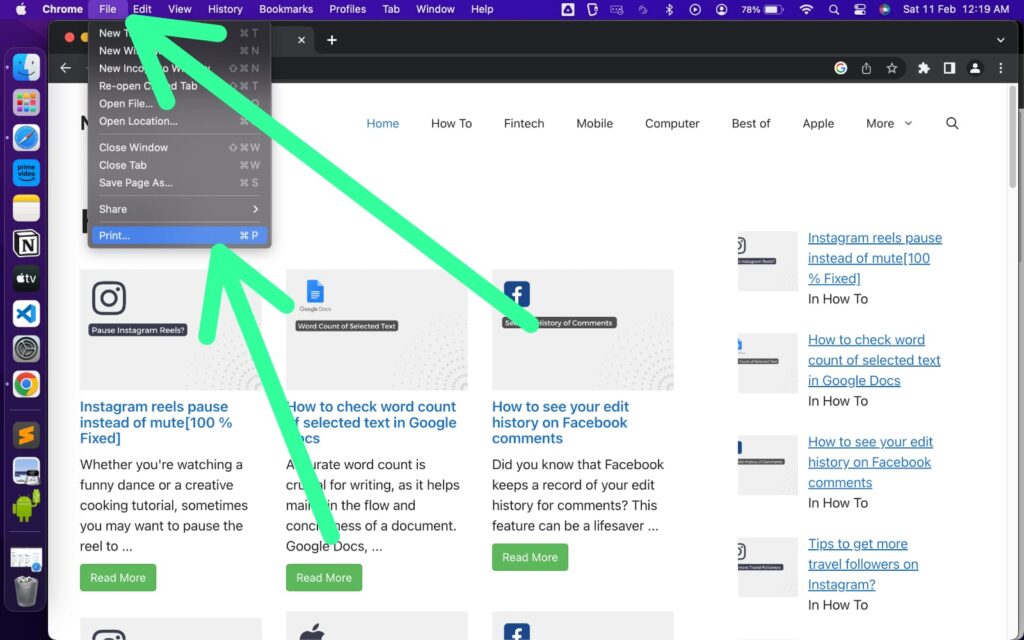
Step 1: Open Chrome and Access the Desired Webpage
To begin, launch Google Chrome on your Mac and navigate to the webpage that you wish to capture. From the top menu bar, click on the “File” option and then select “Print” from the drop-down menu.
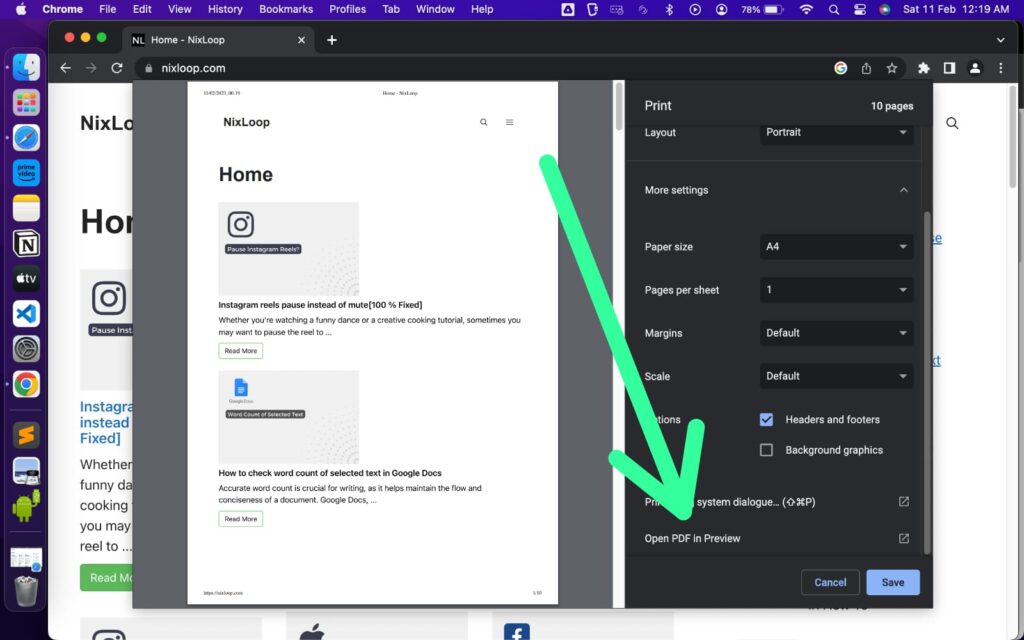
Step 2: Open the PDF in Preview
On the print page, look for an option to “Open PDF in Preview” and click on it. This will open a preview of the webpage in PDF format, which you can then save as a screenshot.
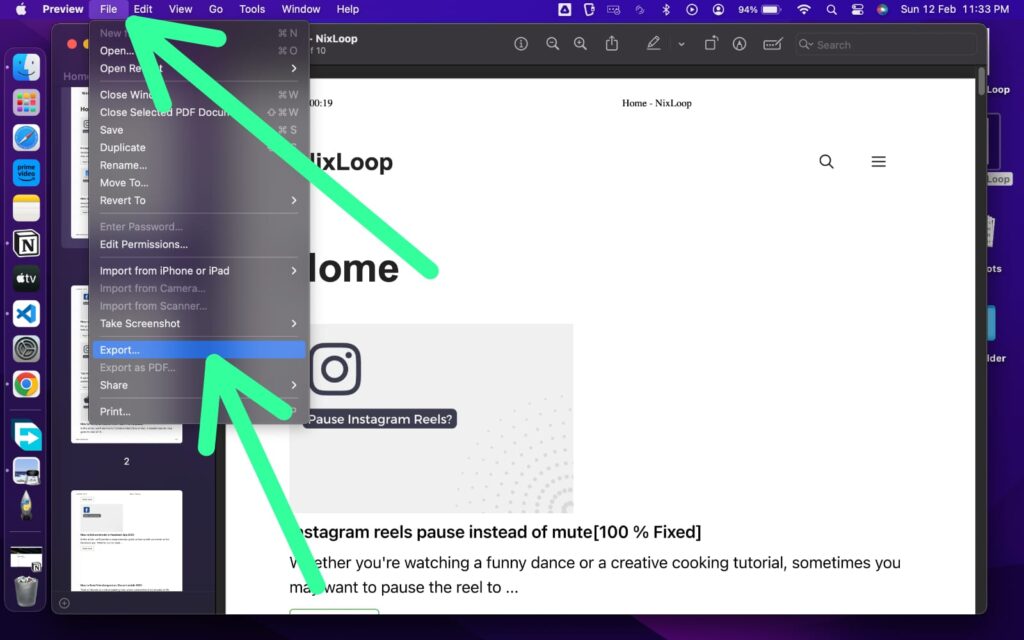
Step 3: Export the PDF
Next, click on the “File” option once again and select “Export” from the drop-down menu.
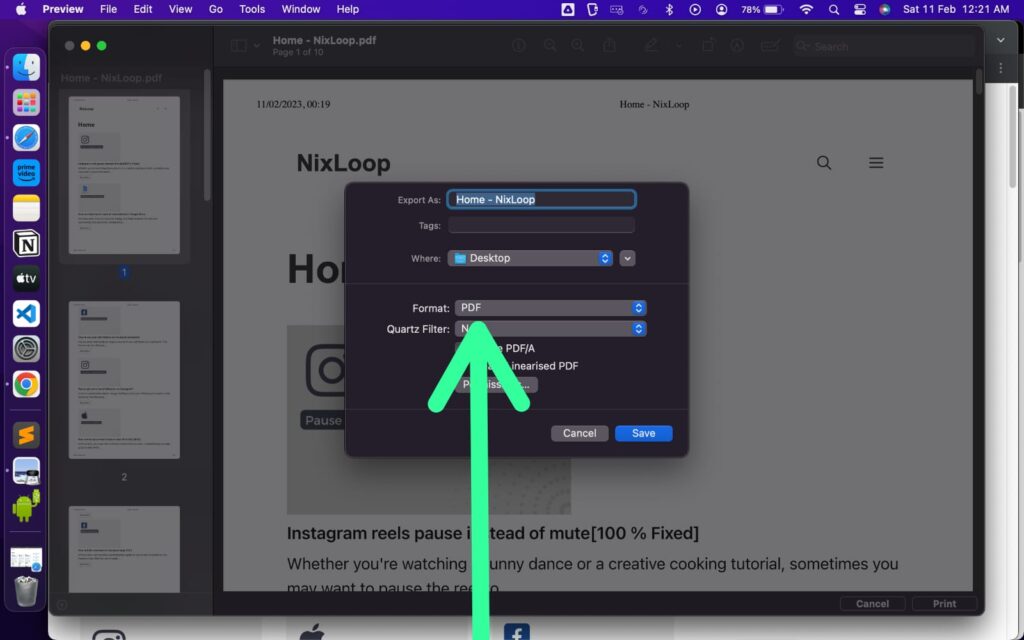
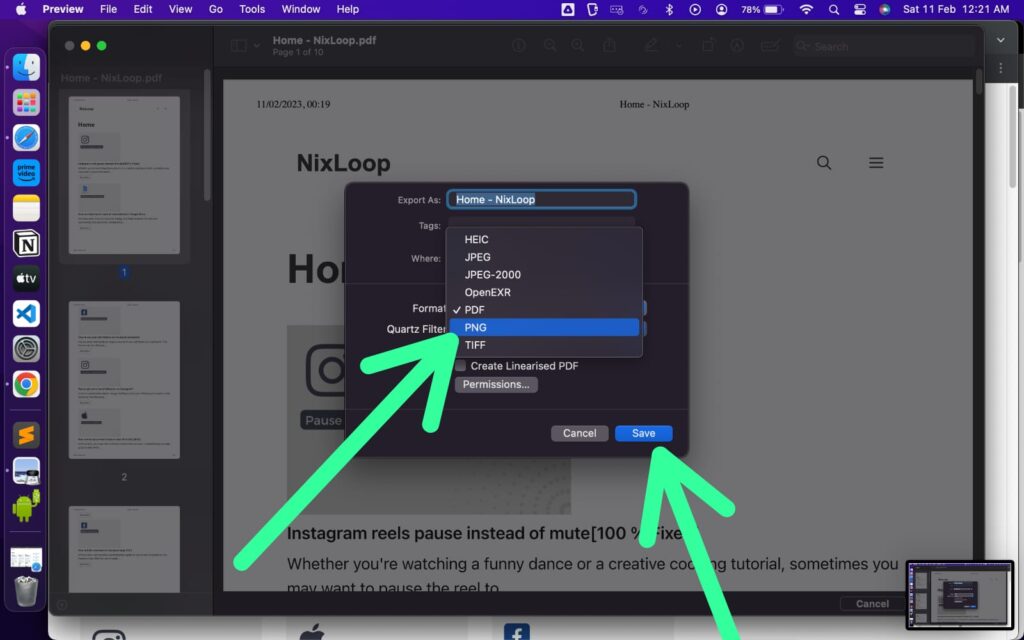
Step 4: Choose a Screenshot Format
In the “Export” dialog box, click on the “Format” option and select the desired format for your screenshot. By selecting the appropriate format, you can ensure that the screenshot is optimized for the intended use.
Step 5: Save the Screenshot
With the format of your choice selected, you can now save the screenshot by clicking on the “Save” button. You can choose to save the file to your preferred location, such as your desktop, documents, or a custom folder. The screenshot will be saved in the format you selected, such as PNG, JPG, TIFF, HEIC, JPEG, or OpenEXR.
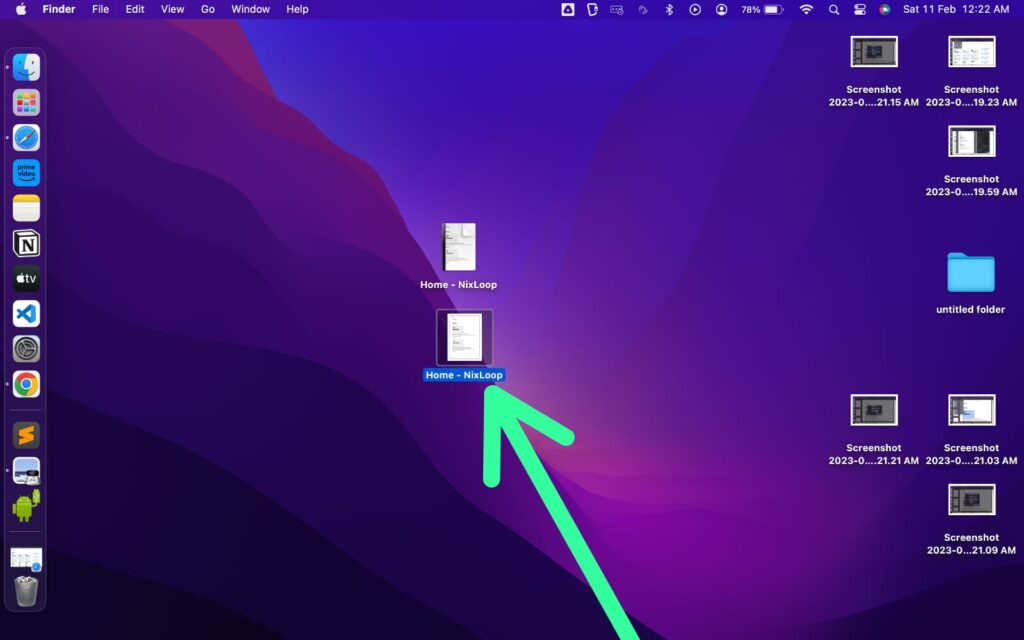
Step 6: Access the Saved Screenshot
Once you’ve completed all of the above steps, the screenshot file will be saved at the location you specified in step 5. The file will contain a full-page screenshot of the website you captured, ready for use or further editing as needed.
Conclusion
Taking a screenshot of an entire webpage in Google Chrome on a Mac is a straightforward process that requires just a few simple steps. Whether you need to capture important information, create presentations, or share information with others, this guide provides a step-by-step process to help you achieve your goals.
Also Read:- How to take a screenshot of an entire webpage in Safari on a Mac?
FAQs
Can I take a screenshot of an entire webpage in Chrome?
Yes, you can take a screenshot of an entire webpage in Chrome by following the steps outlined in this guide. This will allow you to capture the entire contents of the page, even if it extends beyond the visible area of your screen.
What formats can I save my screenshot in?
You can save your screenshot in various formats, including PNG, JPG, TIFF, HEIC, JPEG, and OpenEXR. The format you choose will depend on your intended use for the screenshot.
Can I edit a screenshot after I’ve taken it?
Yes, you can edit a screenshot after it has been taken. You can use image editing software to crop, adjust brightness, add annotations, or perform other edits as needed.
Where will my screenshot be saved?
Your screenshot will be saved to the location you specified when you clicked the “Save” button. This can be your desktop, documents folder, or a custom folder of your choosing.