
If you are looking for How to Hide and password protect your Google Photos, then here is the step-by-step guide given in this article.
There are times when we don’t want anyone to see our very private photos and videos so, in order to add an extra layer of privacy, Google has recently rolled out an important feature that helps in hiding your sensitive photos from other people’s eyes. Earlier the feature was limited to Pixel devices only. But now it’s rolling out for everyone.
So if you also want to hide your private photos within the Google Photos app then follow the steps mentioned below.
Also Read:- How to stop Google Photos backups so that it doesn’t exhaust your 15GB free Gmail storage
How to Hide and password protect your Google Photos
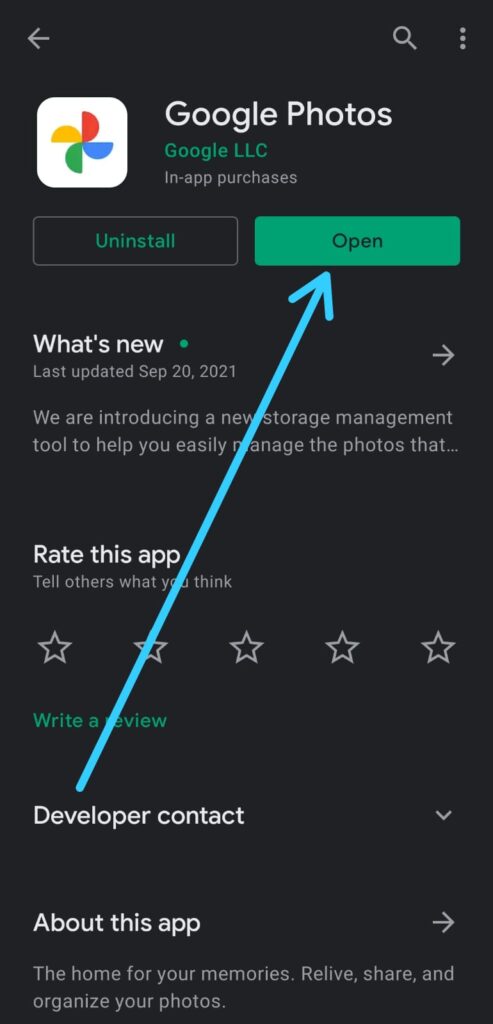
1) In the first step open the Google Photos app, just make sure it’s up to date.
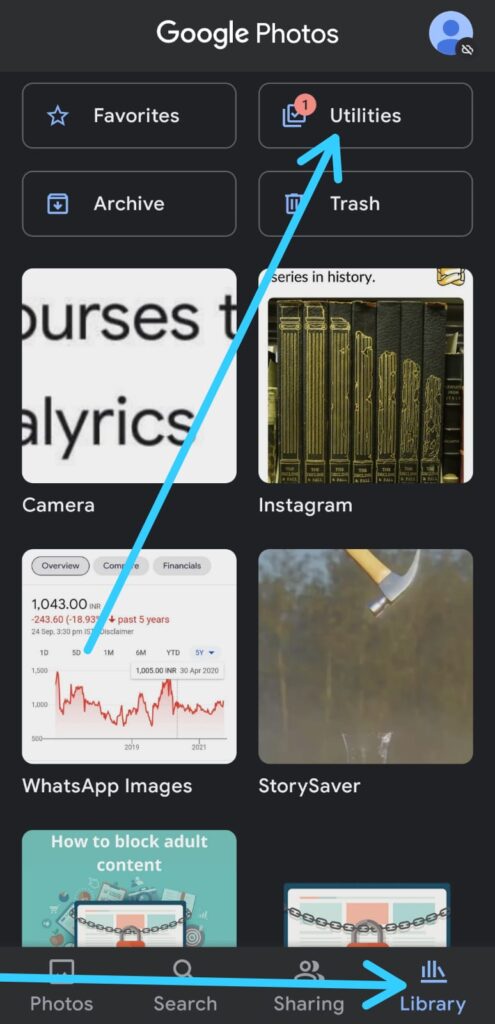
2) In the Google Photos app, go to Library & after that tap on the Utilities button at the top right side.
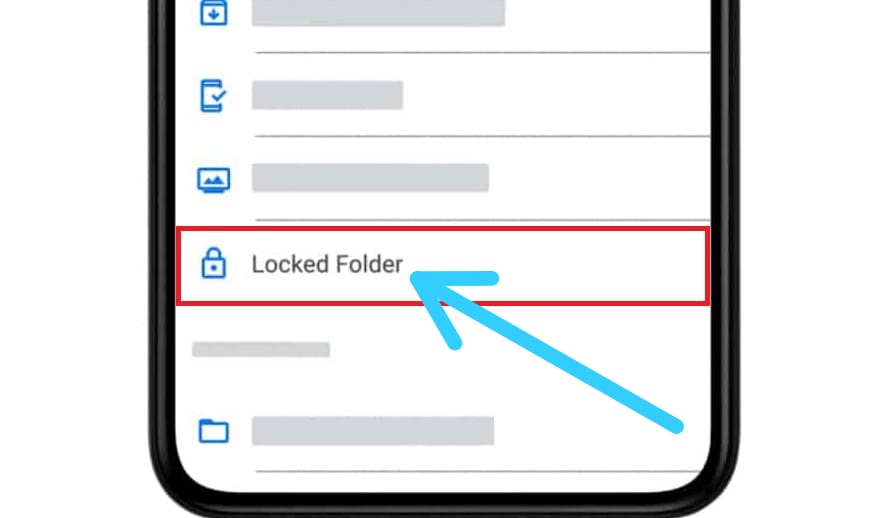
3) In the Utilities scroll down & under the “Organize Your Library” Section, Tap on it “Locked Folder” option.
4) After that tap on “Set up Locked Folder” and then follow the on-screen instructions.
5) Once you set up the Locked Folder, then you’ll be able to move your photos into this.
6) Now to Move Photos to Locked Folder, simply open the photo you want to move & then tap on the three dots icon at the top right corner.
7) Next, From the menu, select “Move to Locked Folder” and then tap “Move”.
Also Read:- How to download your Google Photos: 10 Step guide
Wrapping up
This is all on the topic of How to Hide and password protect your Google. I hope it helps you.
If you got any issues then feel free to ask in the comment section or our Twitter page.
For more tips & tricks related to Google Photos, You can join our Telegram Channel –NixLoop to get Notify on our future updates.