If you are searching for a Way to Check Your Wi-Fi Signal Strength on Windows 11, Here are the steps to follow in Windows 11.
In nowadays we work mostly from home, in that case, a low Wi-Fi signal can be a source of frustration. So it’s important to know Why is your WiFi signal is weak on your PC.
By knowing the signal strength of the Wi-Fi connection on your PC can help to determine if the slow connectivity is a signal problem and not an issue with your Internet Service Provider or wireless access point.
So in this article, we will show you how to measure the signal strength of your Wi-Fi connection on your Windows 11 PC.
Also Read:- 10 Best Media Players for Windows 11 You Can Use
Note: The methods work similarly in Windows 10 as well.
How to Check Your Wi-Fi Signal Strength on Windows 11
There are multiple ways to check the Wi-Fi signal strength on Windows 11. So here we will talk about each one.
1) How to check Wi-Fi signal strength using the taskbar
To determine the signal strength of a Wi-Fi connection using the taskbar, use these steps:
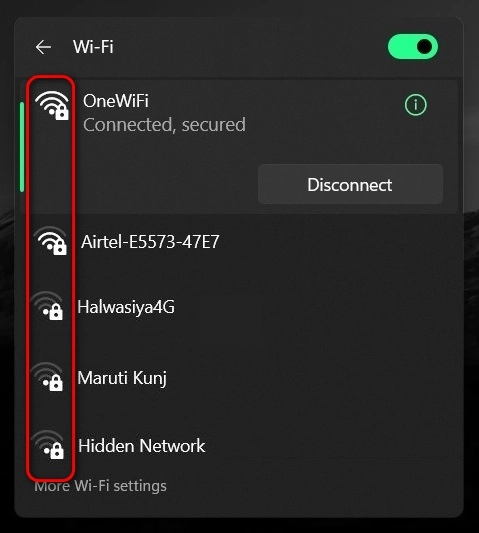
1. On the taskbar of Windows 11, Click on the network icon in the notification area.
2. Here you’ll get the list of all the wireless networks near you.
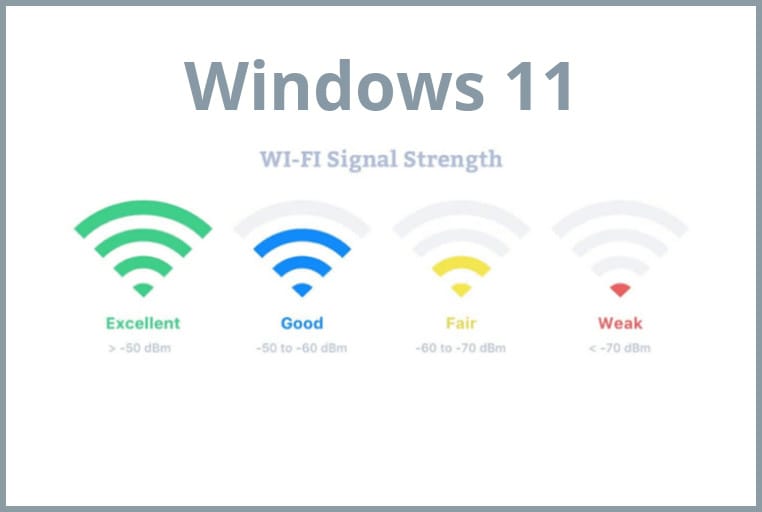
3. Before the wifi name you’ll see the wifi icon, here the higher the number of solid bars means the stronger the signal.
You can understand these bars this way:
- 1 solid bar means that the signal is weak
- 2 bars indicate the signal is acceptable
- 3&4 bars represent the best signal you can get
2) How to check Wi-Fi signal strength using Command Prompt
To check the signal strength of a Wi-Fi connection using Command Prompt, You have to be connected to a Wi-Fi network.
1. open the Command Prompt by searching for cmd in the Windows search box and click the top result to open the app.
2. As Command Prompt opens up then type the following command and press the Enter:
netsh wlan show interfaces
3. Above the profile you’ll get the Signal. In front of the signal, you’ll get a percentage by which you can easily determine the signal quality.
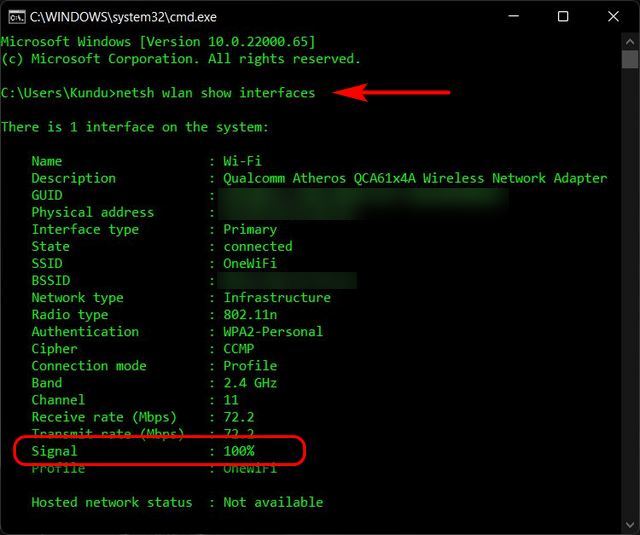
If the percentage is equal to or higher than 80, then the strength of the signal is good.
3) How to check Wi-Fi signal strength using PowerShell
To view the signal strength of a Wi-Fi connection using PowerShell, you again have to be connected to a Wi-Fi network.
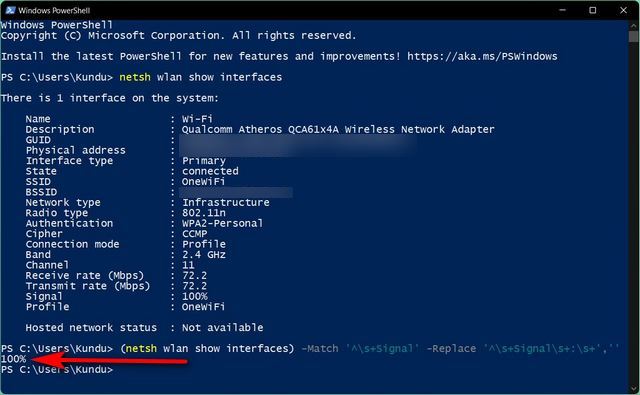
1. In the first step search for powershell in the Windows search box and click the top result to open the app.
2. Now Copy & Paste the following command in PowerShell to view Wi-Fi signal strength & press Enter:
(netsh wlan show interfaces) -Match '^\s+Signal' -Replace '^\s+Signal\s+:\s+',''
3. See the signal quality output. (The percentage goes from 0 to 100, where 100 percent indicates excellent signal quality.)
Similar to Command Prompt, in PowerShell, you can also run the netsh wlan show interfaces command to view signal quality.
Both commands will give the same result but the second command will filter out the additional info and only show you the percentage that indicates your Wi-Fi signal quality.
Also Read:- Windows 11 vs Windows 10: What Windows 10 features are removed from Windows 11
Wrap Up: Check Your Wi-Fi Signal Strength
So these are the 3 Ways to Check Your Wi-Fi Signal Strength on Windows 11. If you need any other help then feel free to ask in our Telegram Group.
For more tips & tricks related to Windows 11, You can join our Telegram Channel –NixLoop to get Notify on our future updates.
2 thoughts on “3 Ways to Check Your Wi-Fi Signal Strength on Windows 11”