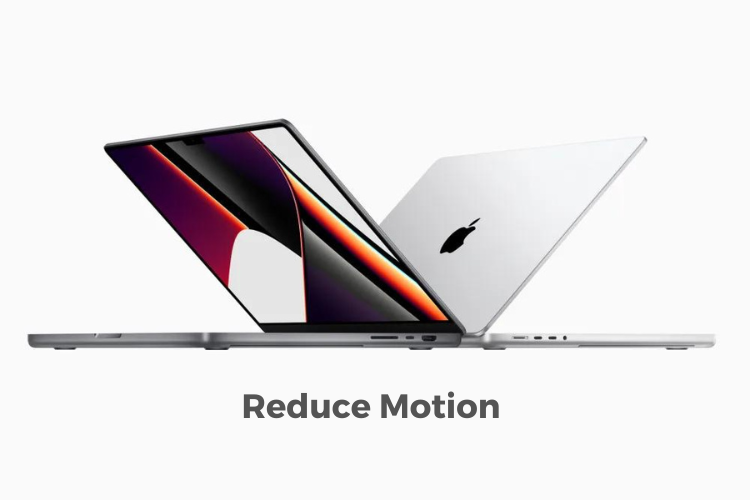
If you’re experiencing slow performance on your Mac, our guide provides a simple solution to speed it up by using the “reduce motion” feature.
By following our step-by-step instructions, you can easily reduce motion on your Mac and make your on-screen transitions snappy. Keep in mind that while reduce motion improves the appearance of your Mac, it doesn’t actually make it faster.
What does reduce motion on Mac do?
In the Mac, you get the option of reduce motion, which just stops or reduce the movement of some elements you see on your screen. You get the slow animation of different motions like when you open apps, switch between desktops, etc. For some people, this slow-motion animation looks good but some don’t like it. So they can reduce motion & it’ll make your transition very snappy.
According to Apple, reduce motion is very helpful for people who experience sickness or vertigo. So if you are one of them then you can try this.
Also Read:- How much does every Macbook pro weight
Steps to reduce motion in Mac
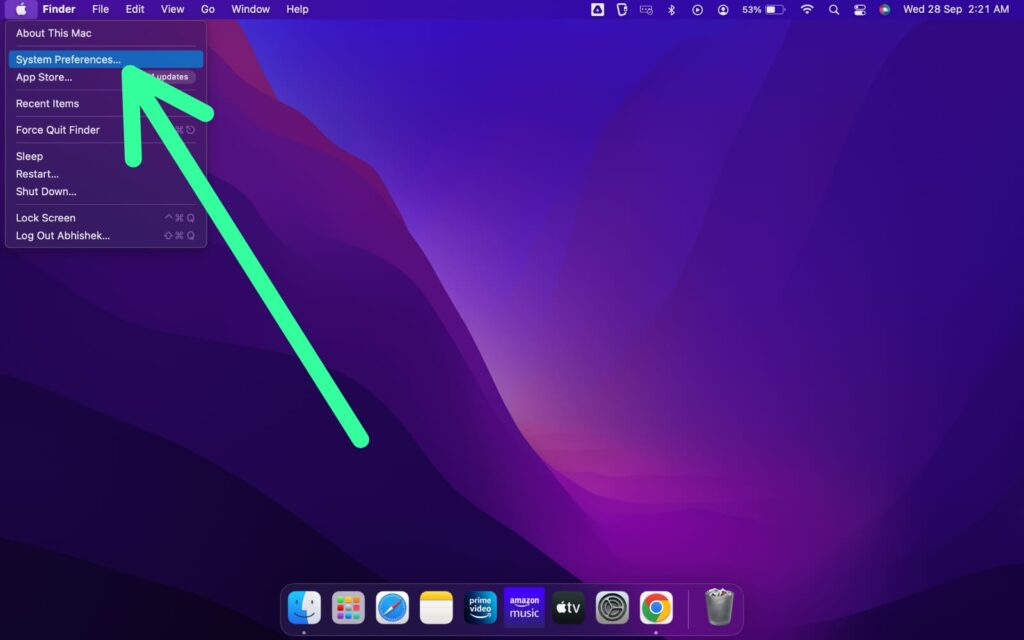
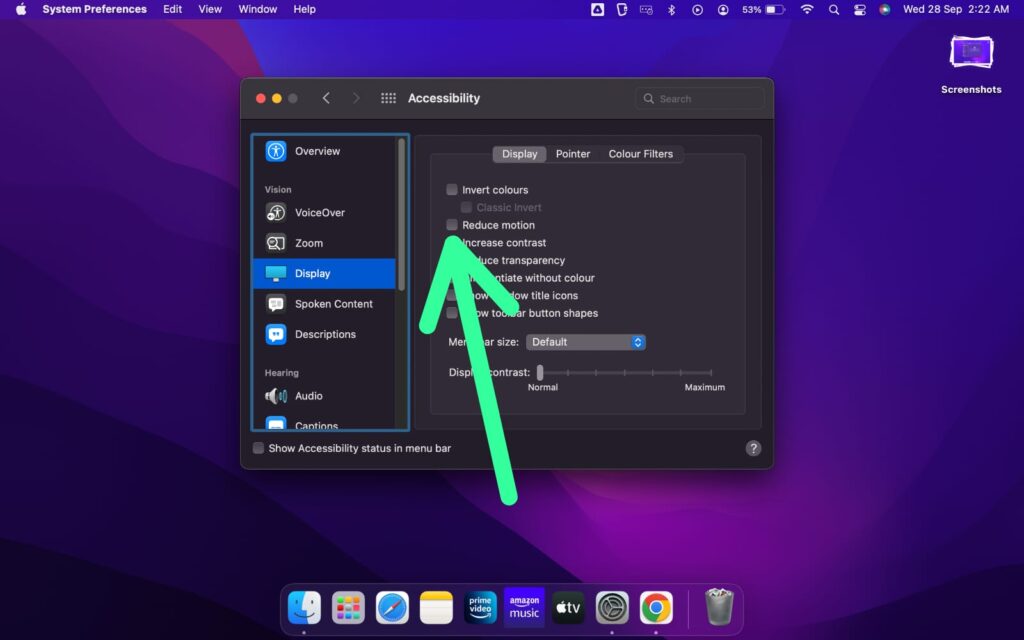
Step 1: Click on the Apple icon at the top left corner & then select the System Preferences option.
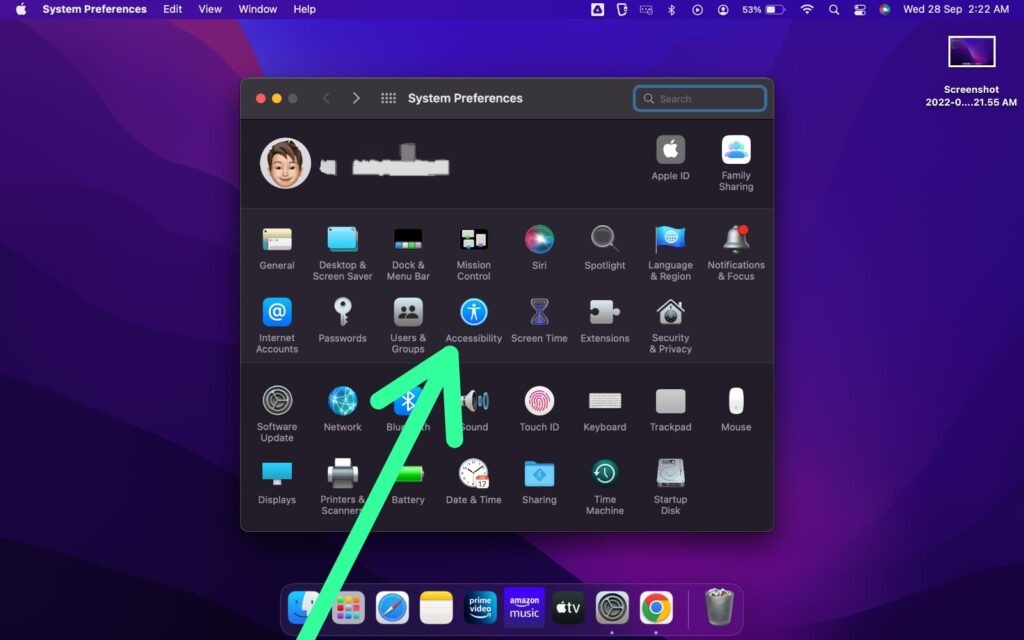
Step 2: In the system preference settings, click on the Accessibility option.
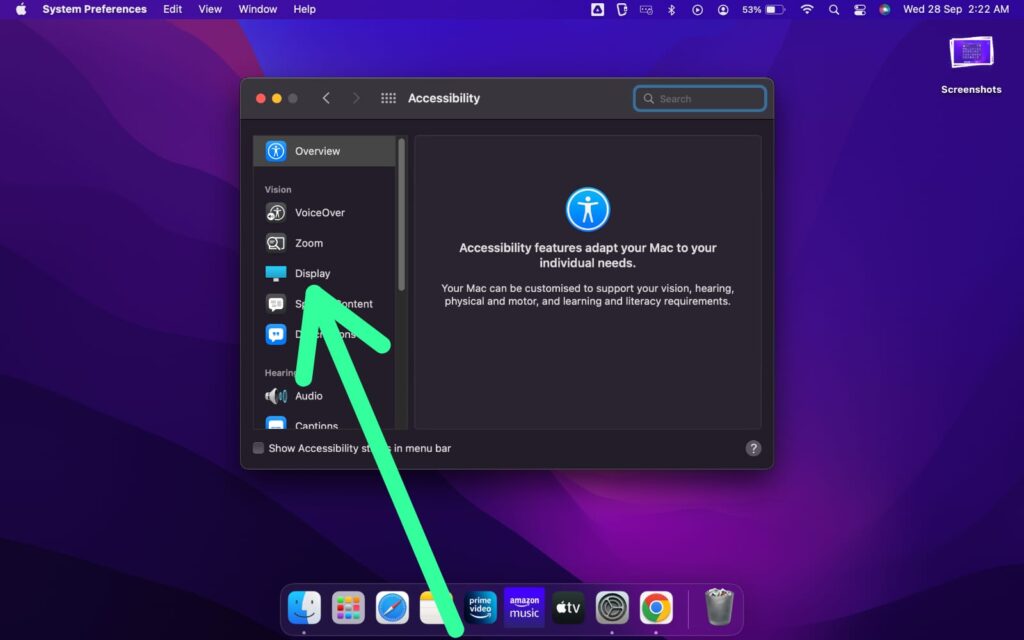
Step 3: Under the Accessibility settings, select the Display option.
Step 4: Under the Display section, checkmark the Reduce motion option & that’s it.
Does reduce motion make Mac faster?
Reduce motion, makes your on-screen transition very fast. It simply removes the slow-motion effect you got when you do the transition of desktops or open any app. Which just makes your mac look snappy but in reality, it doesn’t make your Mac faster.
In the end, do consider following us on Twitter –NixLoop to get Notified of our future updates.